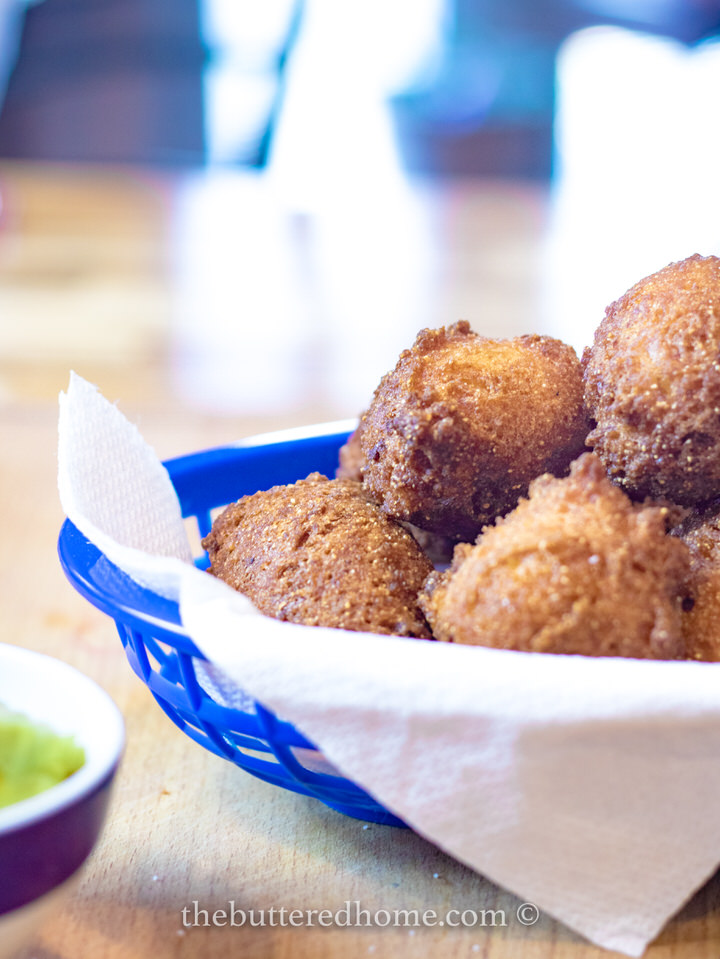
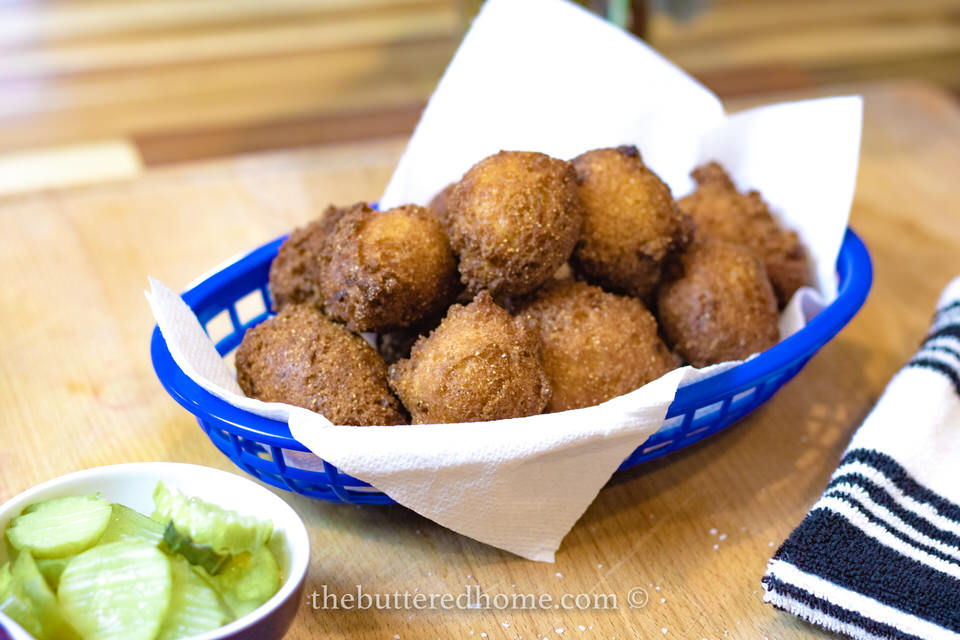
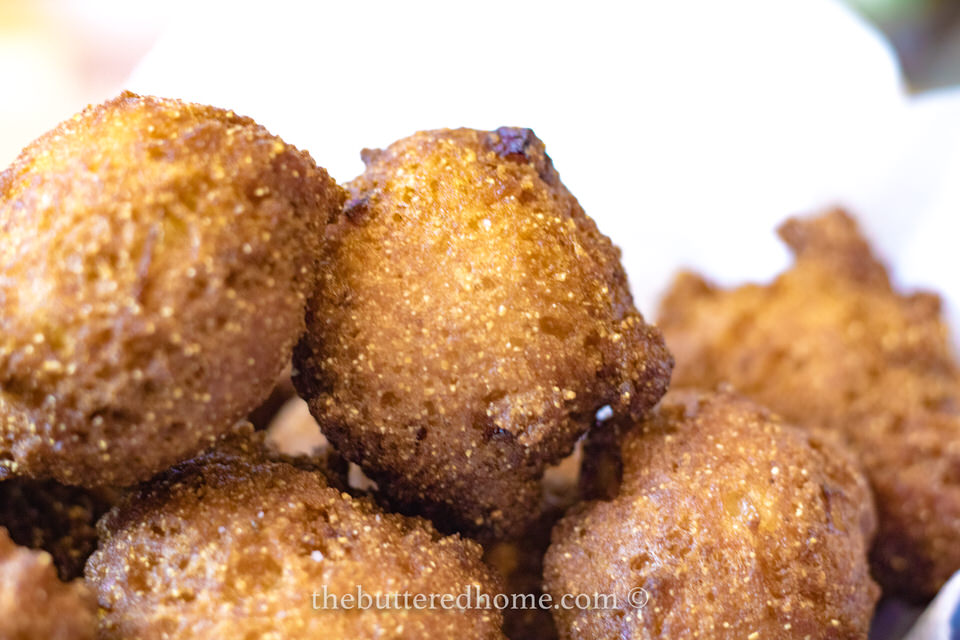
Deep Fried Hushpuppies
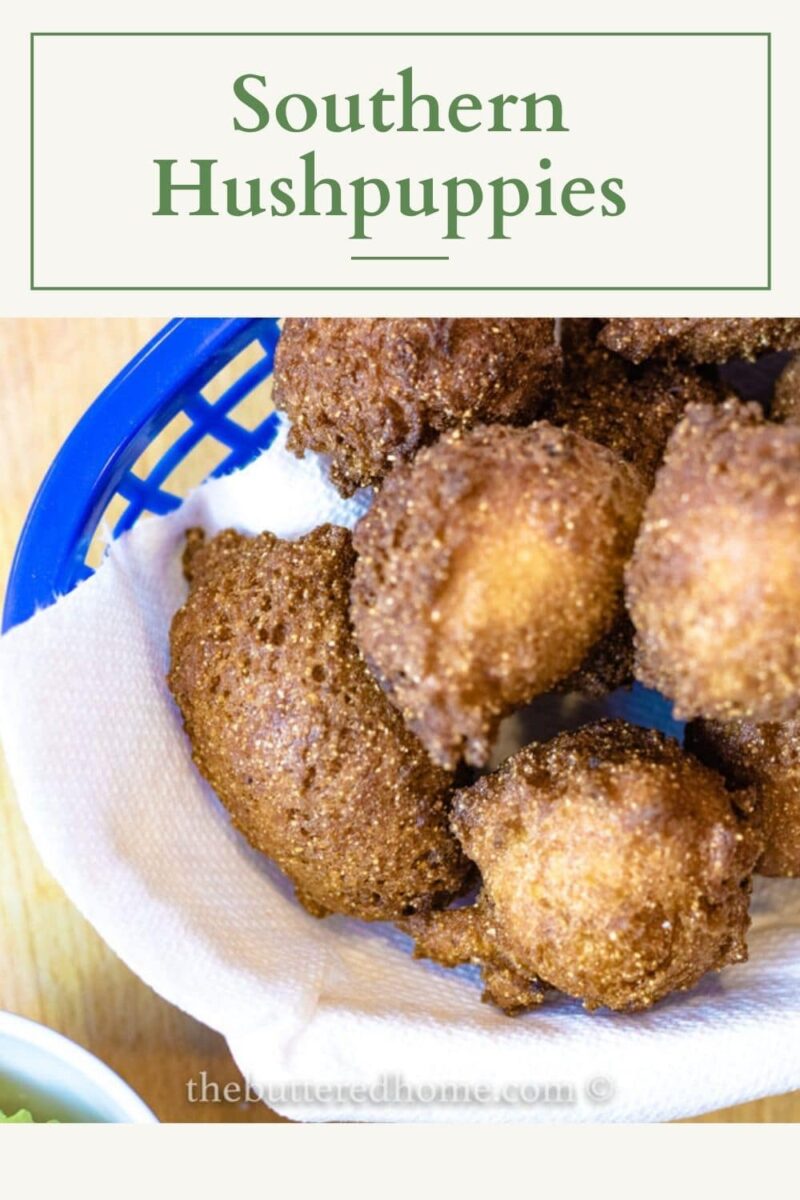

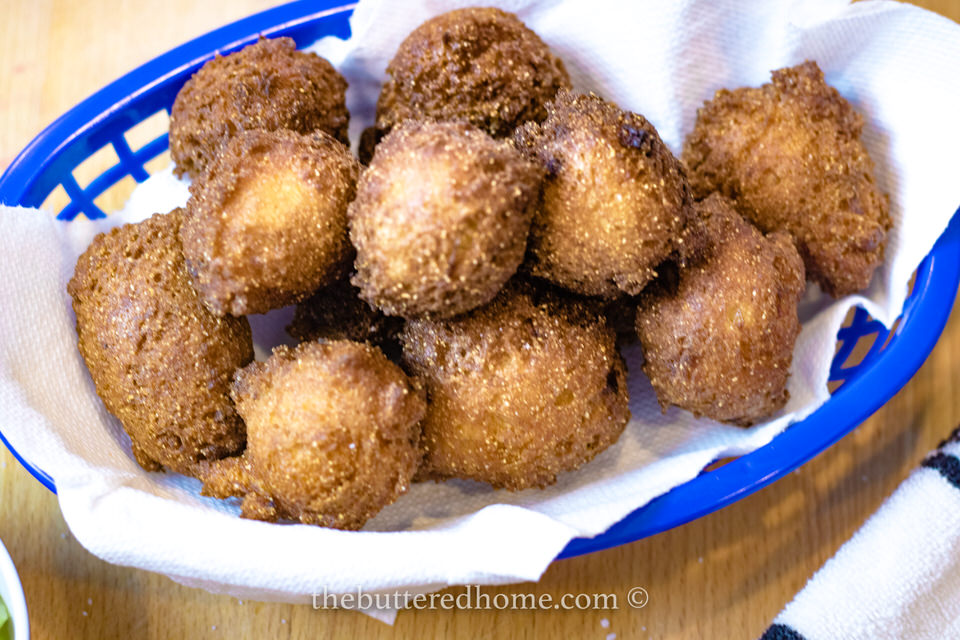
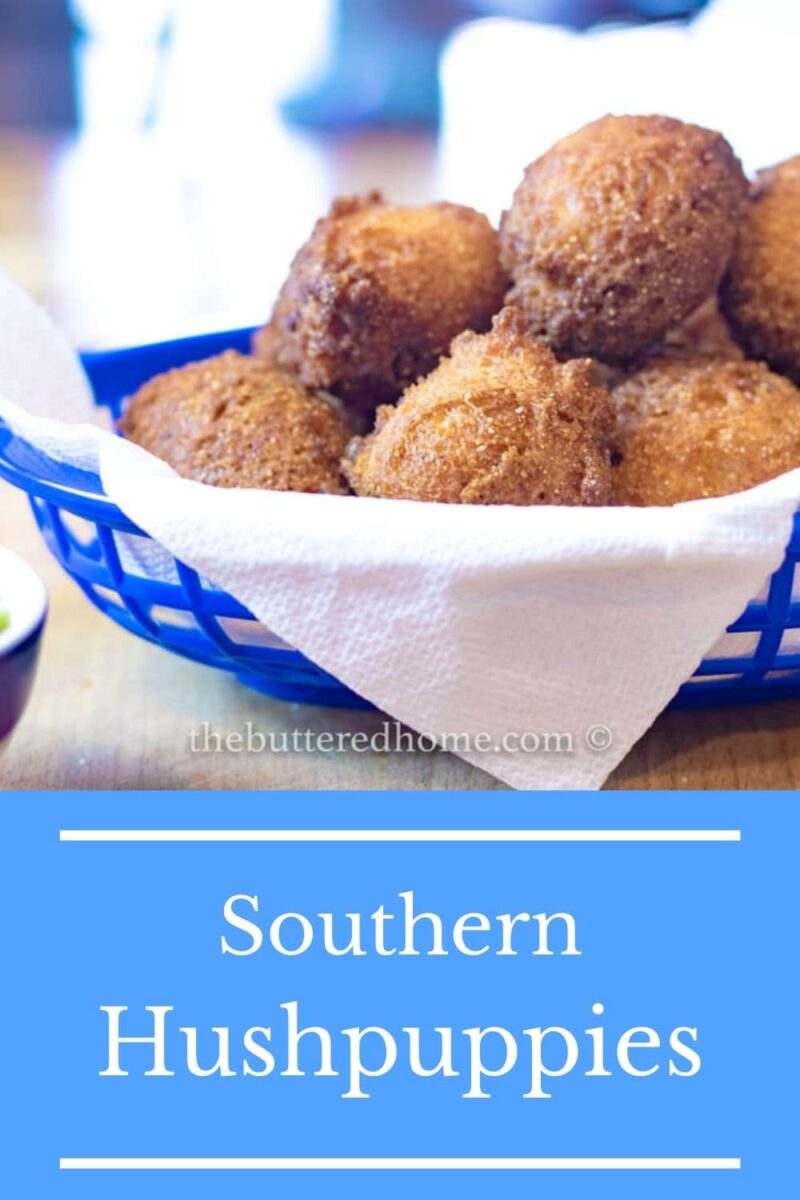
Deep Fried Hushpuppies are an excellent addition to any supper. Whether you are serving Fish or Prime Rib, these bites of earthy goodness are too good to eat just one!
Hush Puppy! Myth or Legend?
Deep Fried Hush Puppies have a really neat food story. I love a good food story. You can find all kinds of stories in my food. They don’t have to be old stories either. They can be new ones. Kind of like the ones I have made for years with my girls at Christmas making treats like this CHRISTMAS CRUNCH.
It sure seems like though, there is a tall tale around every Southern food. Hushpuppies, no doubt, fit that bill. I am sure we have all heard the story of Confederate soldiers frying fish and trying to get their dogs to stop howling. Well, I hate to break it to you, that is just not true.
This small bite, savory confection has roots in South Carolina. An African American named Romy Govans was actually known far and wide for serving what he called “Red Horse Bread” in his fish camp Club House in the early 20th century. People came from all over to feast on Fish that were in season there and the Red Horse Bread became what he is most famous for. It wasn’t until about 20 years later that the name changed down in Florida to Hushpuppies.
No matter what you call them, they are to be eaten and enjoyed in multiples! I always knew they couldn’t just be a little old dog treat!
How to Make Them!
These Deep Fried Hushpuppies really are very simple. It just makes sense to have them when frying fish since you already have the grease heated up. I am here to tell you though, get that grease hot, even if you are having Prime Rib, they are something worth frying for!
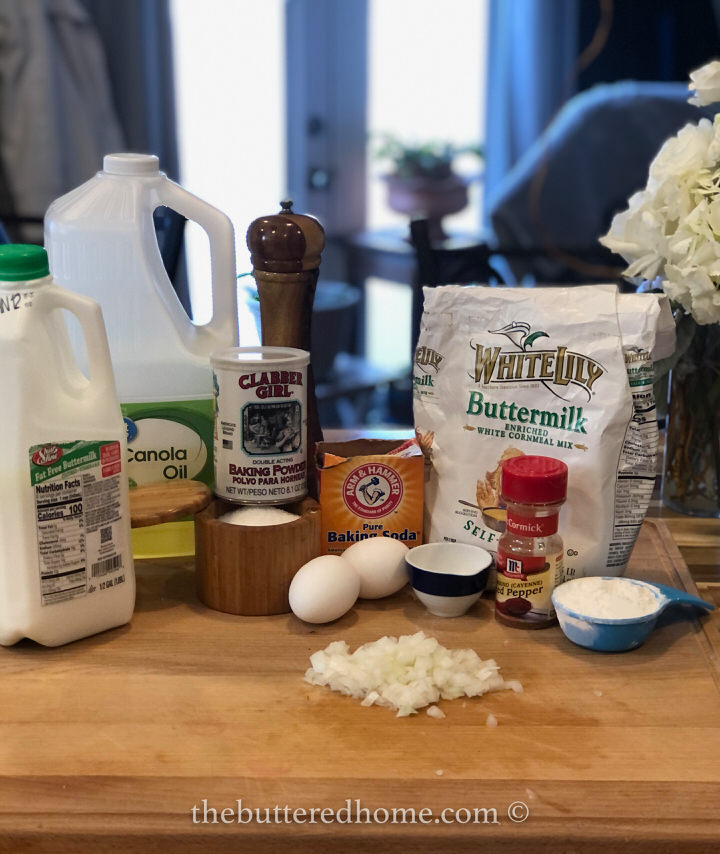
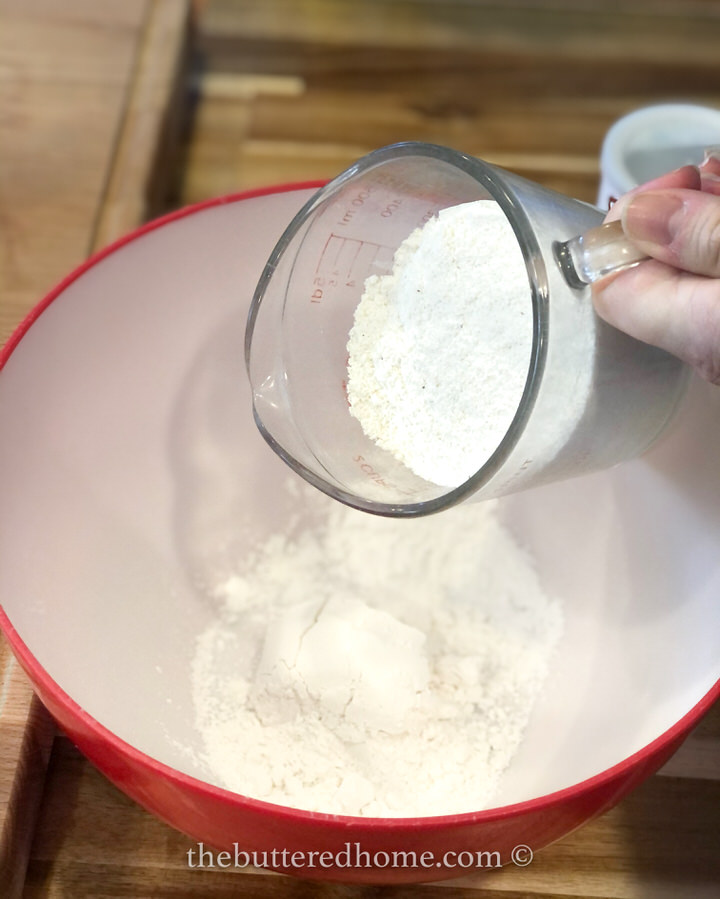
- 1 & 2/3 cups Cornmeal – Any kind is fine. I always have self rising cornmeal mix on hand so I use it!
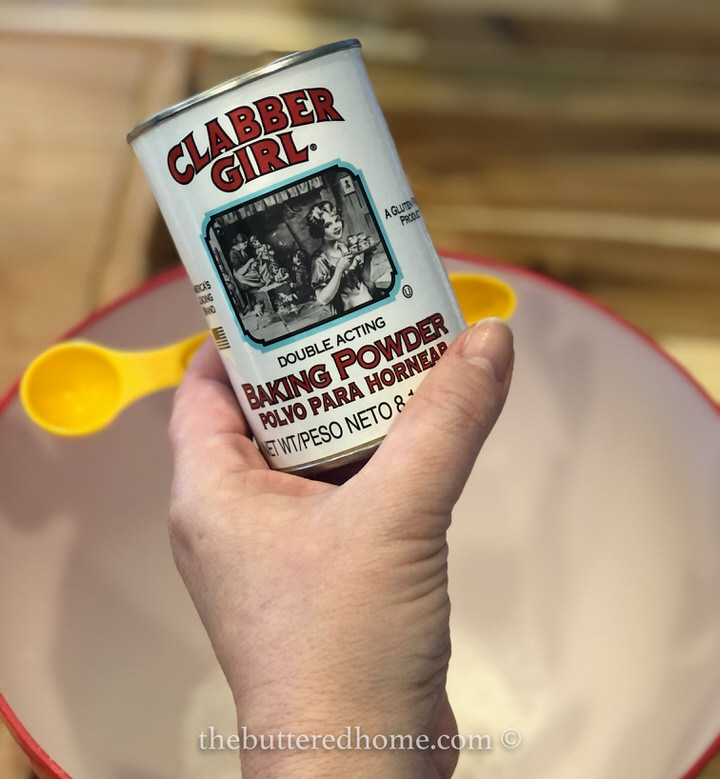
- 2 teaspoons baking powder – This is to help them really puff up and give you that light and airy texture!
- 1/3 cup Plain Flour – again, for the puffy texture that helps soften the batter a bit.
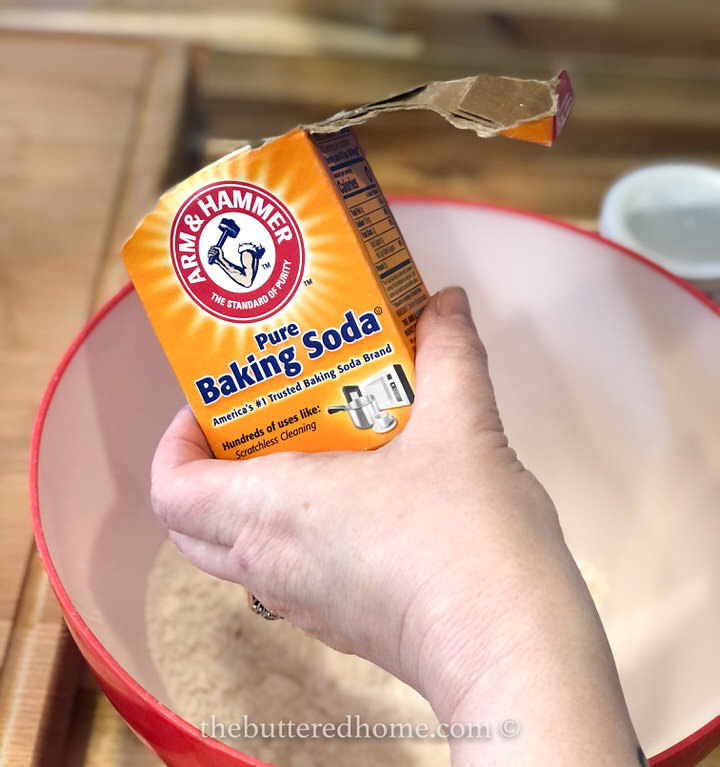
- 1/2 teaspoon baking soda – baking soda works with the baking powder to add a little acidity to the mixture and help it rise..
- 1 tablespoon sugar – just a hint of sweet that always compliments the savory!
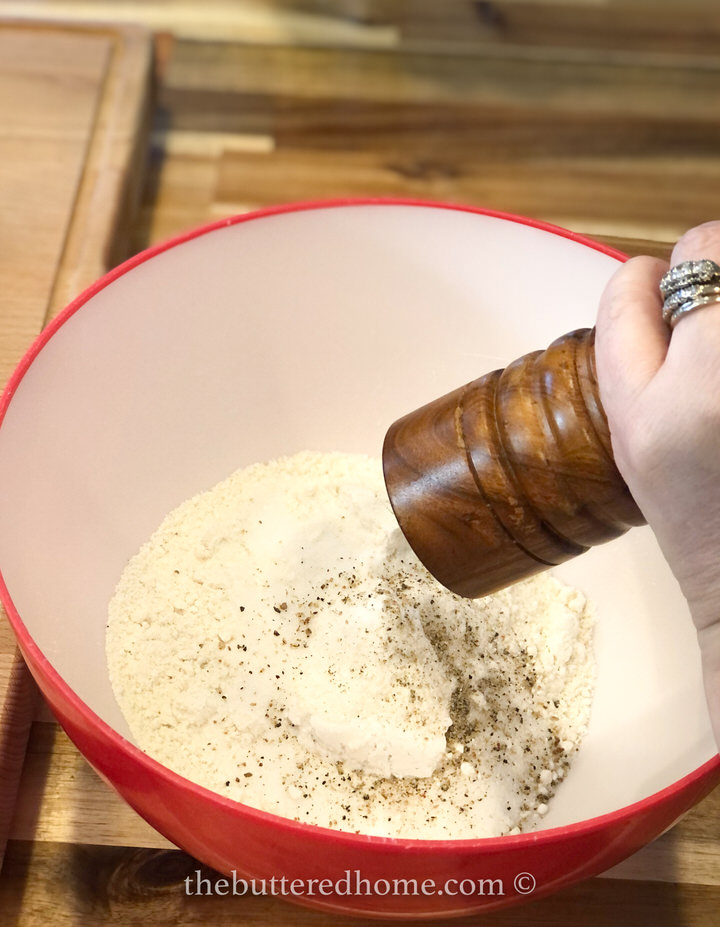
- 1/4 teaspoon pepper – for just a little earthy kick!
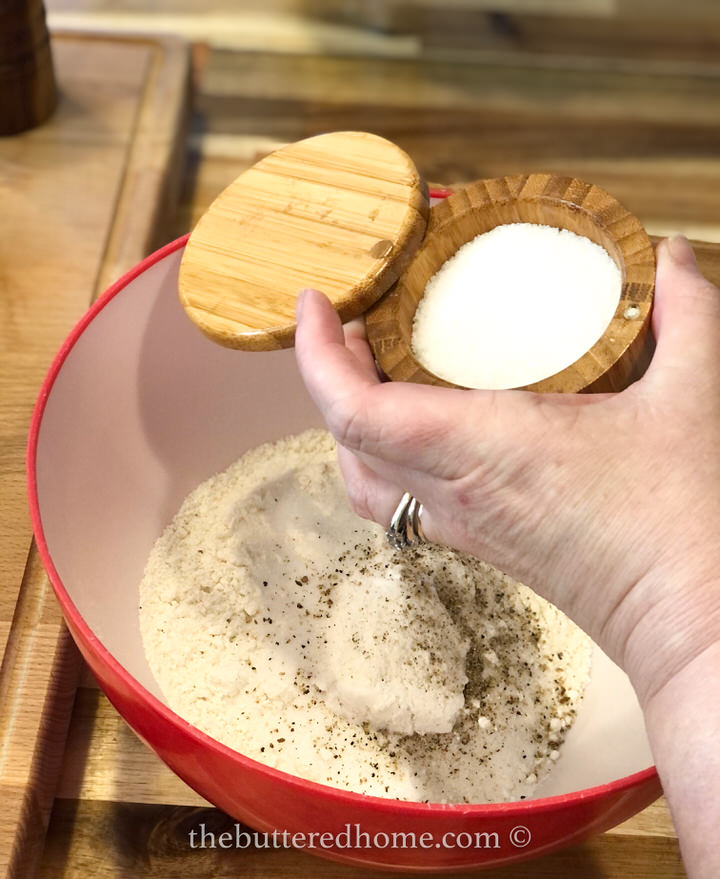
- 3/4 teaspoon salt – flavor, flavor, flavor!
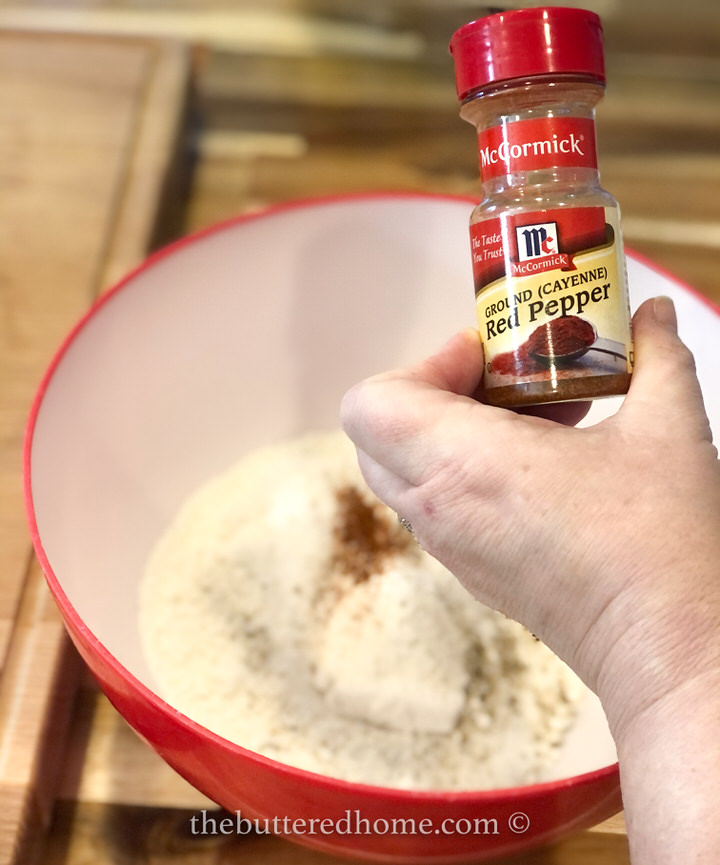
- 1/8 teaspoon cayenne pepper – feel free to omit this but it sure adds a little something extra that won’t knock your socks off.
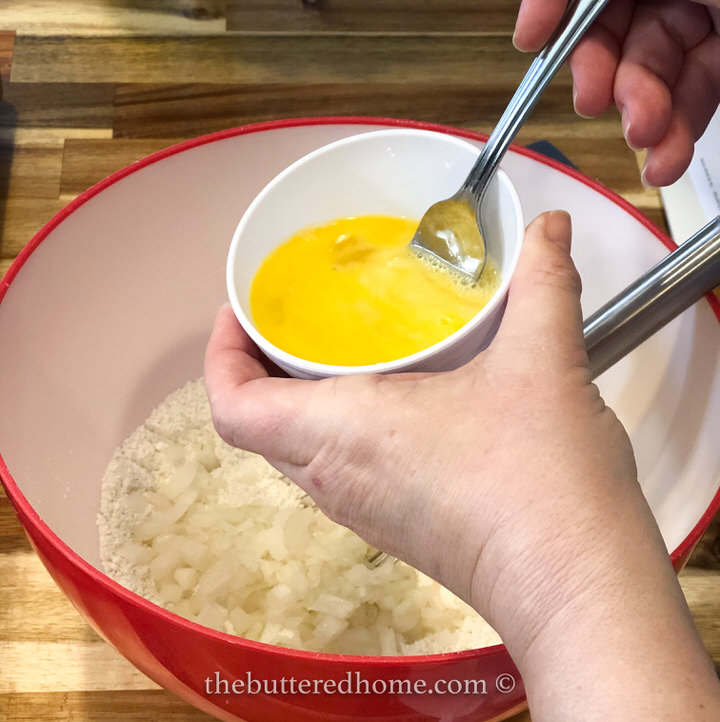
- 2 eggs, beaten – to bind and add a creaminess.
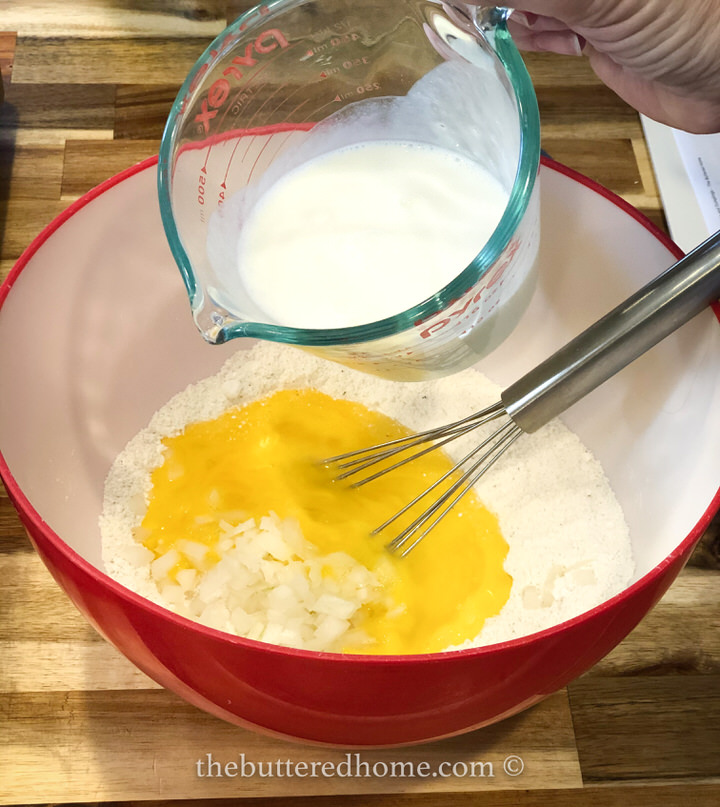
- 1 cup Buttermilk – full fat or low fat, either is fine. Food is all about the mixture of taste and texture and buttermilk adds both!
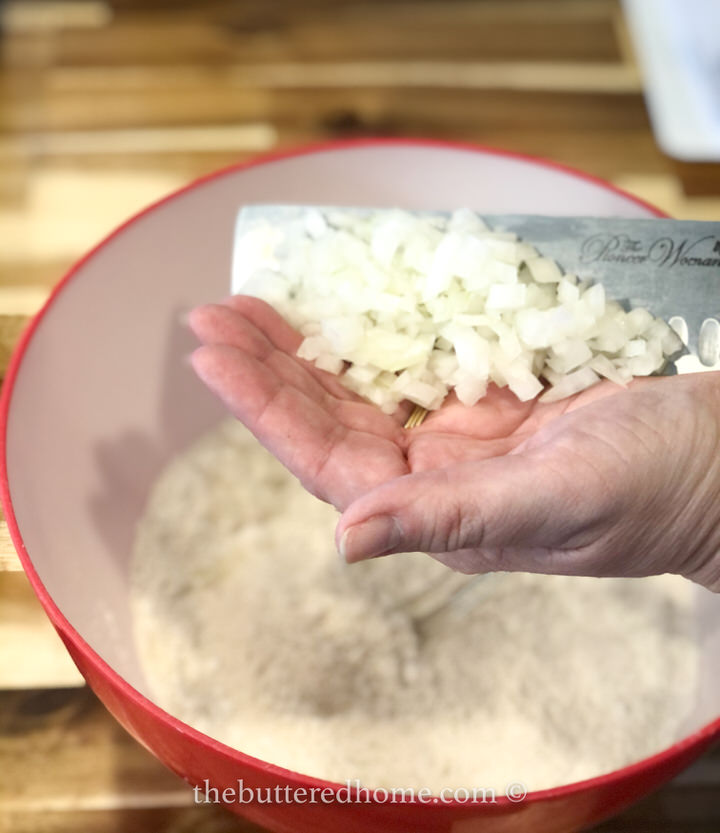
- 1/4 cup Diced Onion – again, flavor and texture. The onions can be diced so fine you won’t even know they are in there if need be!
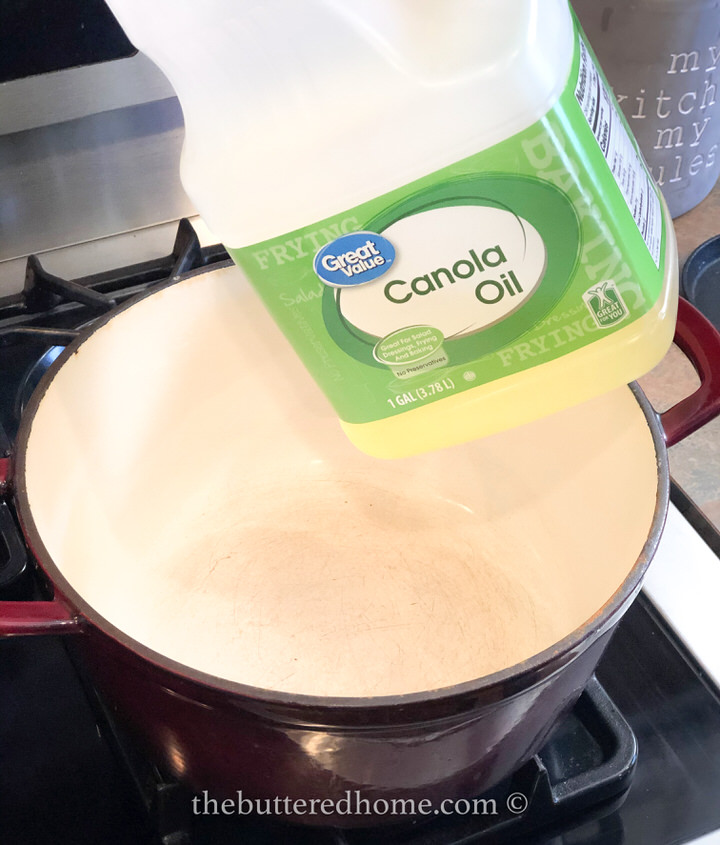
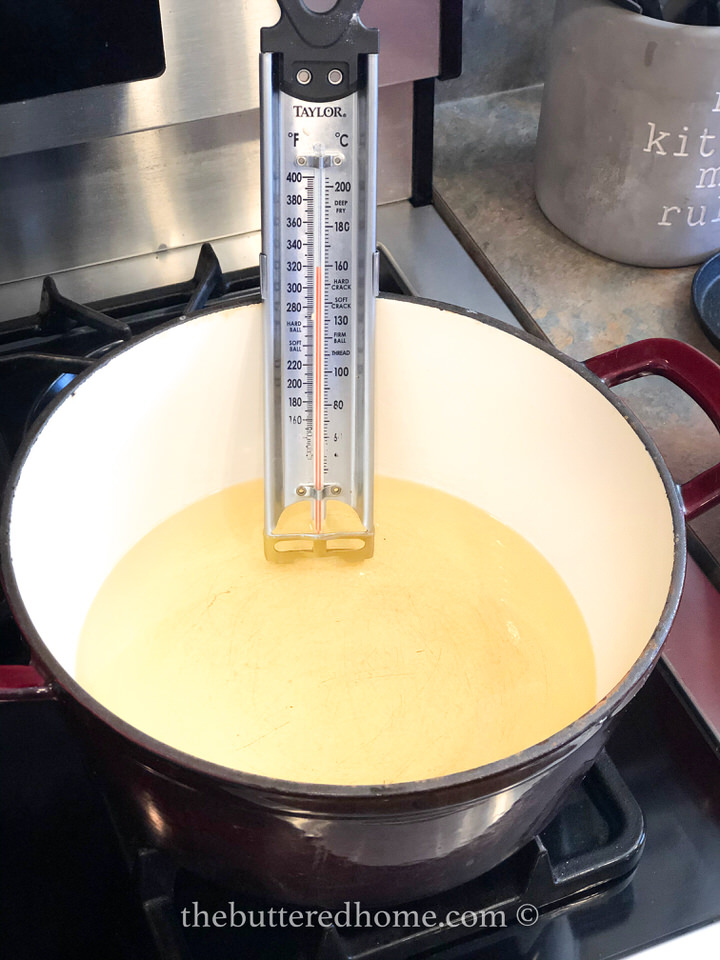
- Oil for frying – we used a 6 quart dutch oven to fry for less mess. The total amount of oil will vary depending on frying vessel, but you will need to fill to at least 2 inches for deep frying.
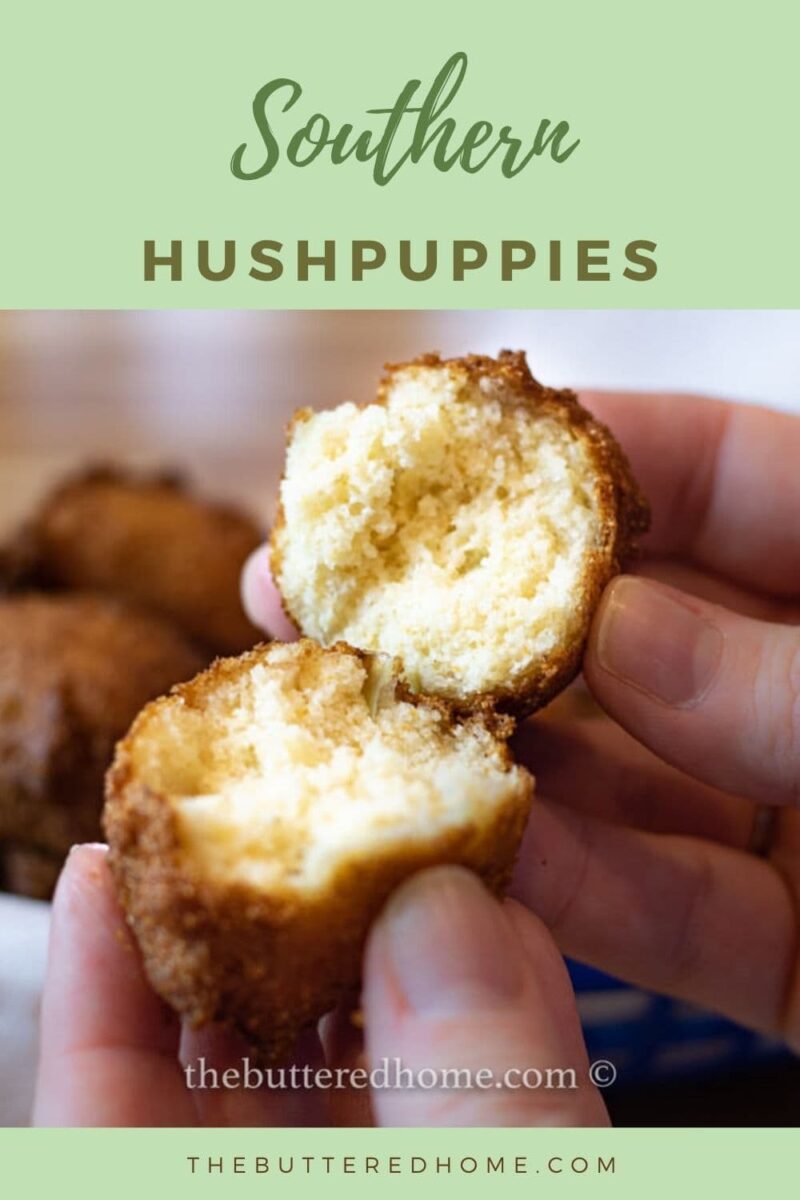
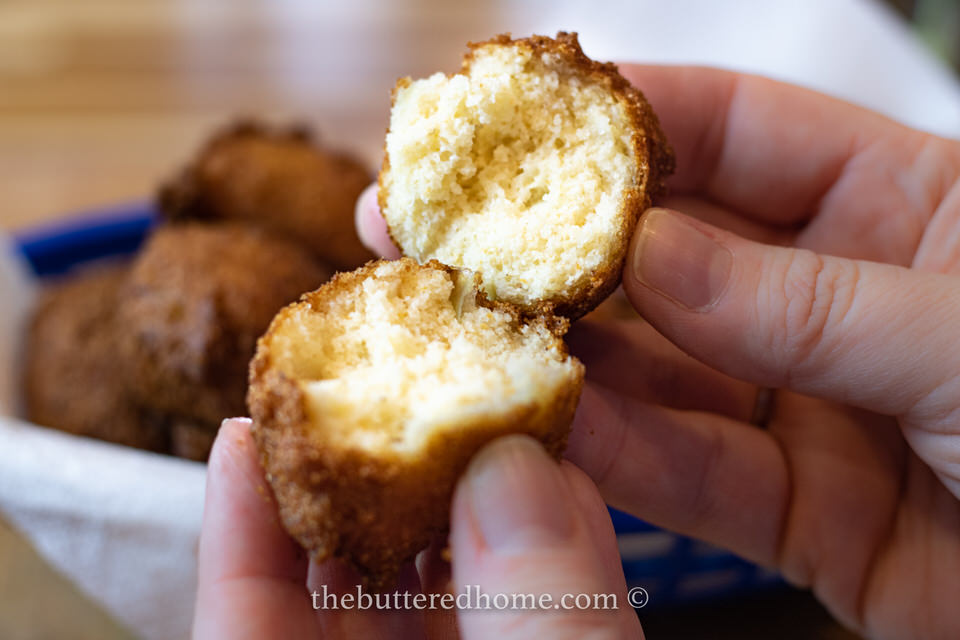
Just like with cakes, you do not want to over mix this batter. It is best just to bring it all together. We always let ours sit before frying about 5 minutes. I usually mix it up and then heat the oil. The batter just magically changes in that amount of time.
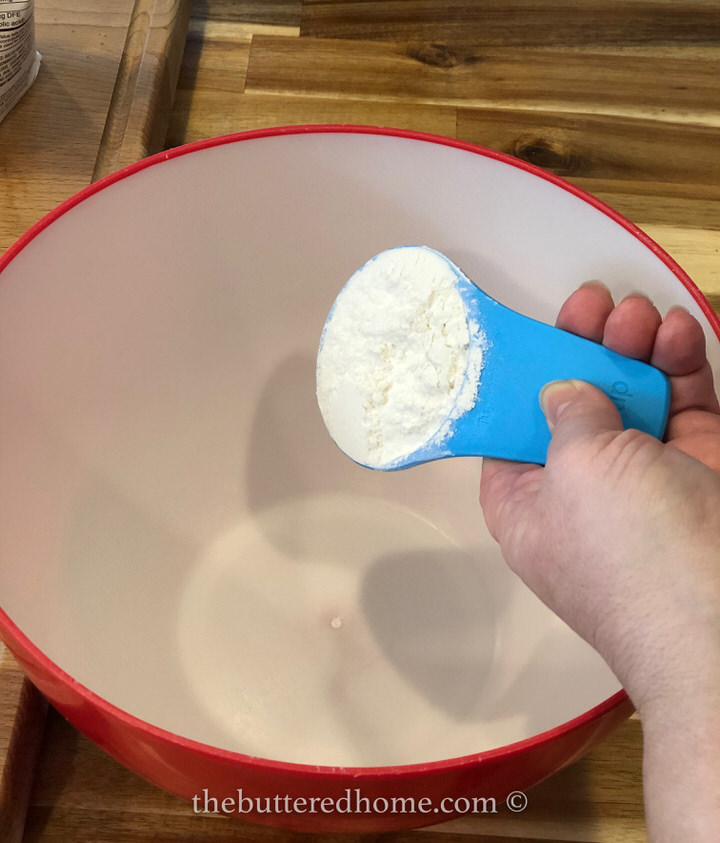
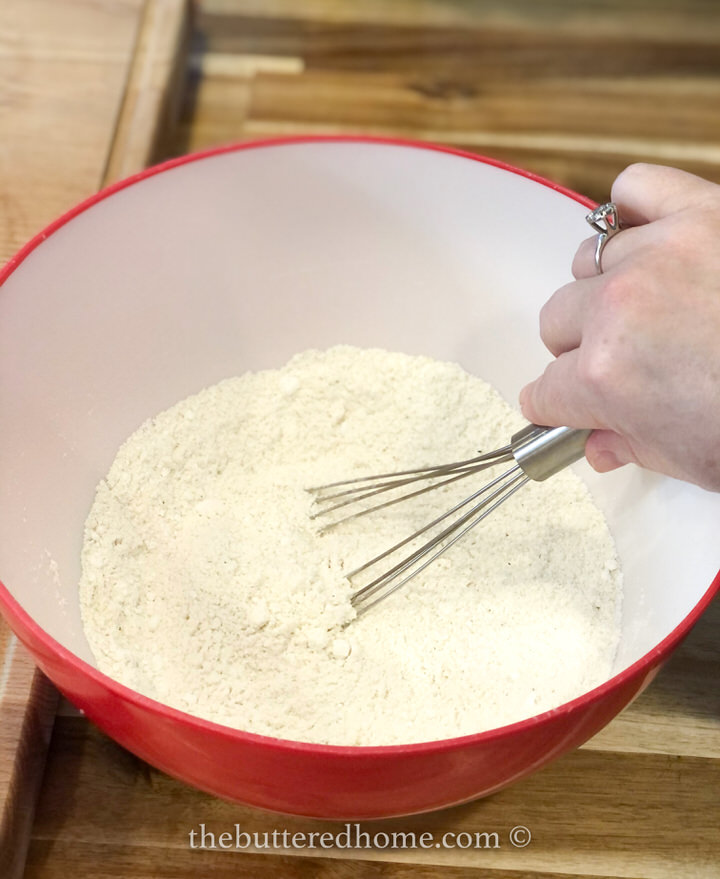
- Sift dry ingredients together. Cornmeal, baking powder, baking soda, flour, sugar, salt and peppers. Mix well.

- Add eggs, buttermilk and onion to dry ingredients and stir just until combined. Set aside while you heat the oil
Want to save this recipe?

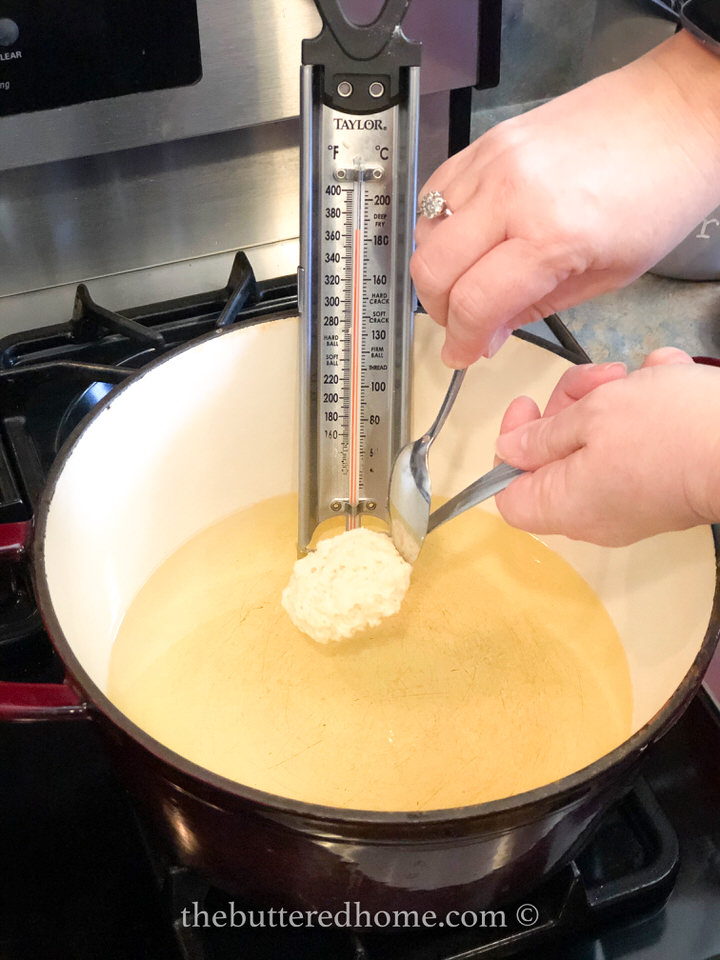
- Pour oil into a heavy cast iron pan or dutch oven until you have at least 2 inches of oil in the entire bottom of the pan. Closely monitor oil and heat to 350 degrees.
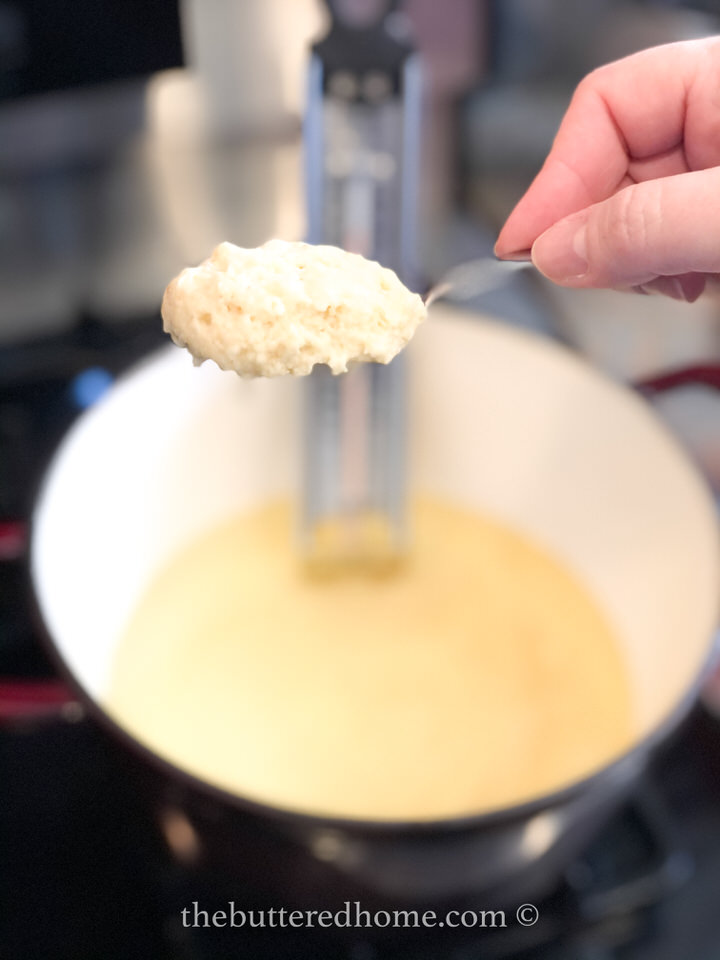
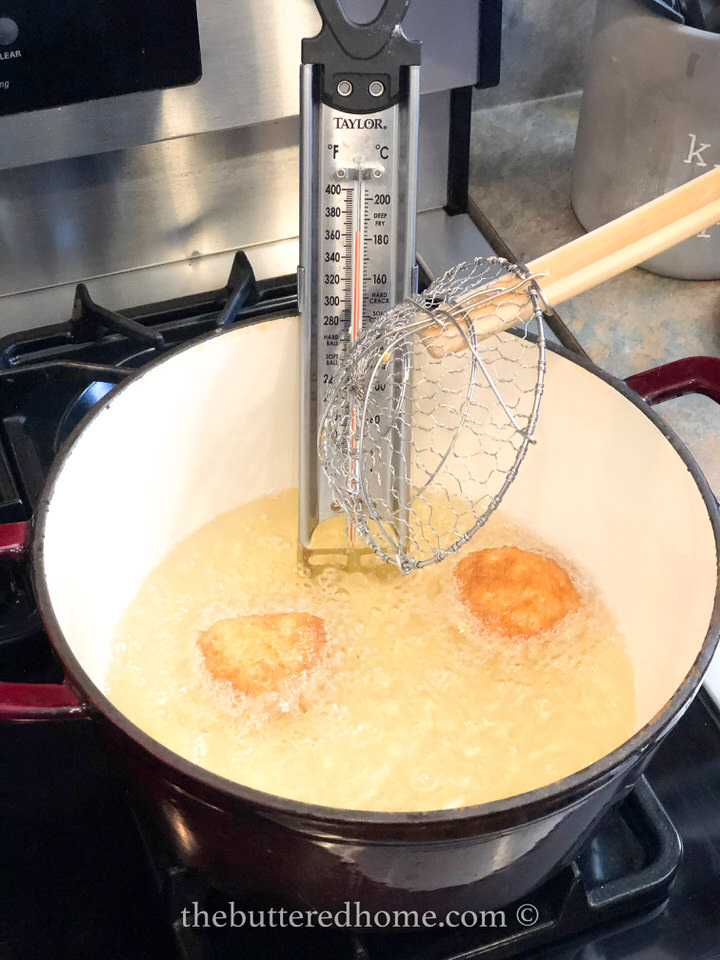
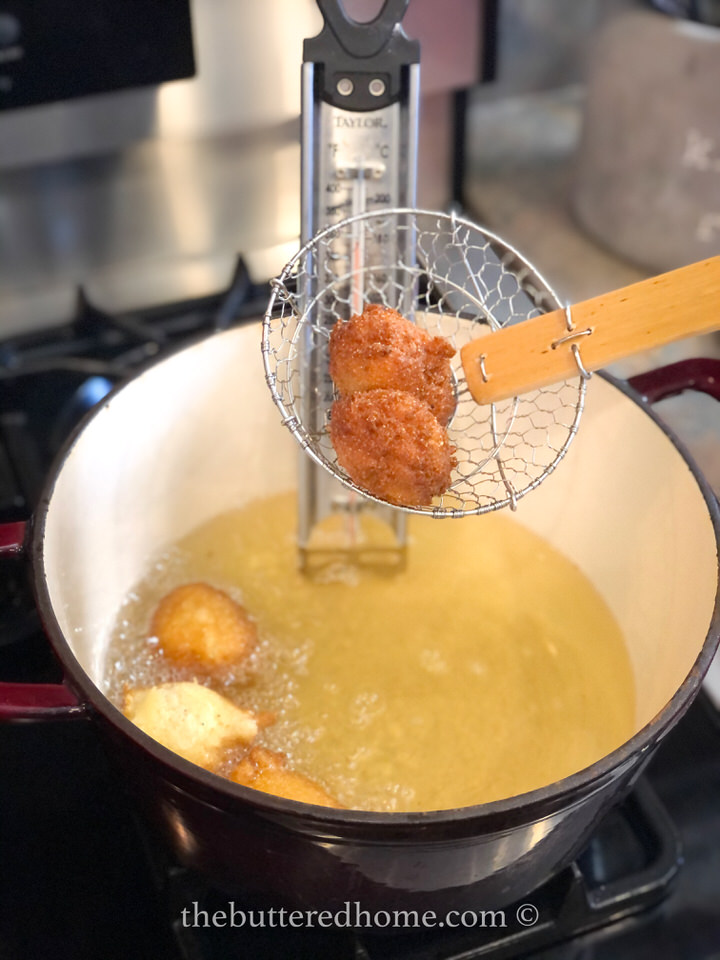
- Using a large spoon, take out 2 tablespoon spoonfuls and shape into an oblong ball. Carefully drop into the oil and fry for 1.5 to 2 minutes, carefully turning with a spoon or spider until golden brown.
- Drain on a paper towel. Serve and enjoy!
Tips and Tricks
Of course! Just know the shallower the pan, the more likely they are to stick to the bottom. If you don’t have a dutch oven, use a boiler! Just monitor the heat as a boiler will get hotter faster! If you need a great dutch oven, check out our link at the bottom of this post.
You can make them as large or as small as you wish, just know the traditional way is just about as big as a hazelnut. This sizing insures that the middle is done when the outside is.
I like to to use two spoons. One for dipping and shaping and the other for sliding the puppy off into the hot oil. If you make sure to hold them both close to the oil that will decrease burns from oil splatter!
If you are looking for a GLUTEN FREE OR VEGAN option for making these little gems, check out our friend Kristen at Moon, Spoon and Yum. Her recipe for AIR FRYER HUSH PUPPIES is a delicious option!
If you make this recipe, be sure and post it to Facebook or Instagram and tag us. We love pictures of food. Also, if you pin this recipe, we would appreciate that when you make it, you use the Made It function in Pinterest too.
Check out this recipe along with many of our others as a WEB STORY!
And as always, we would love it if you shared this recipe with your family and friends. Over to the side on this post and all of the others are handy dandy share buttons. We would sure be grateful if you shared the love!


Deep Fried Hushpuppies
Ingredients
- 1.6 cups cornmeal
- 2 teaspoons baking powder
- 1/3 cup plain flour
- 1/2 teaspoon baking soda
- 1 tablespoon sugar
- 1/4 teaspoon pepper
- 3/4 teaspoon salt
- 1/8 teaspoon cayenne pepper
- 2 eggs beaten
- 1 cup buttermilk
- 1/4 cup diced onion
- oil for frying
Want to save this recipe?
Instructions
- Sift dry ingredients together. Cornmeal, baking powder, baking soda, flour, sugar, salt and peppers. Mix well.1.6 cups cornmeal, 2 teaspoons baking powder, 1/3 cup plain flour, 1/2 teaspoon baking soda, 1 tablespoon sugar, 1/4 teaspoon pepper, 3/4 teaspoon salt, 1/8 teaspoon cayenne pepper
- Add eggs, buttermilk and onion to dry ingredients and stir just until combined. Set aside while you heat the oil2 eggs, 1 cup buttermilk, 1/4 cup diced onion
- Pour oil into a heavy cast iron pan or dutch oven until you have at least 2 inches of oil in the entire bottom of the pan. Closely monitor oil and heat to 350 degrees.oil
- Using a large spoon, take out 2 tablespoon spoonfuls and shape into an oblong ball. Carefully drop into the oil and fry for 1.5 to 2 minutes, carefully turning with a spoon or spider until golden brown.
- Drain on a paper towel. Serve and enjoy!


Just wondering about the self-rising cornmeal mix, I have never made hush puppies but everything I’m reading says you do not need the flour, baking soda/powder, etc if you’re using self rising mix. But it looks like you are using them all together, so I just wanted to hear your take on it and why you choose to use the additional flour, baking soda/powder with the self-rising mix. Thanks for your input, I’m excited to make these!
We do use the self rising. I find it makes them fluffier! We do actually say you can use self rising corn meal or regular, with those things added, the recipe works with either. But I confess, I do like using both for the extra fluffiness of the hush puppies!